It is a delightful little build, quite easy to put together, but still very satisfactory detail-wise. There really isn't very much to tell about the build process itself - you simply put it together, paint it and you're done. One minor quible could be that the armoured plate for the pilot is very difficult to glue in place without blemishing the clear cockpit cover, but that's really pushing it. I'll leave it to 'rivet counters' to find all the faults with this model, personally I just love it.
The fact that Airfix provides decals for two paint options - one for a Luftwaffe plane deployed in Africa, the other for Royal Bulgarian Airforce (kudos for the unusual subject selection!) only makes things better. Full set of stencils is also included and everything is made by Cartographer, ensuring that the decals are top quality. For around 110SEK, things don't get better than this!
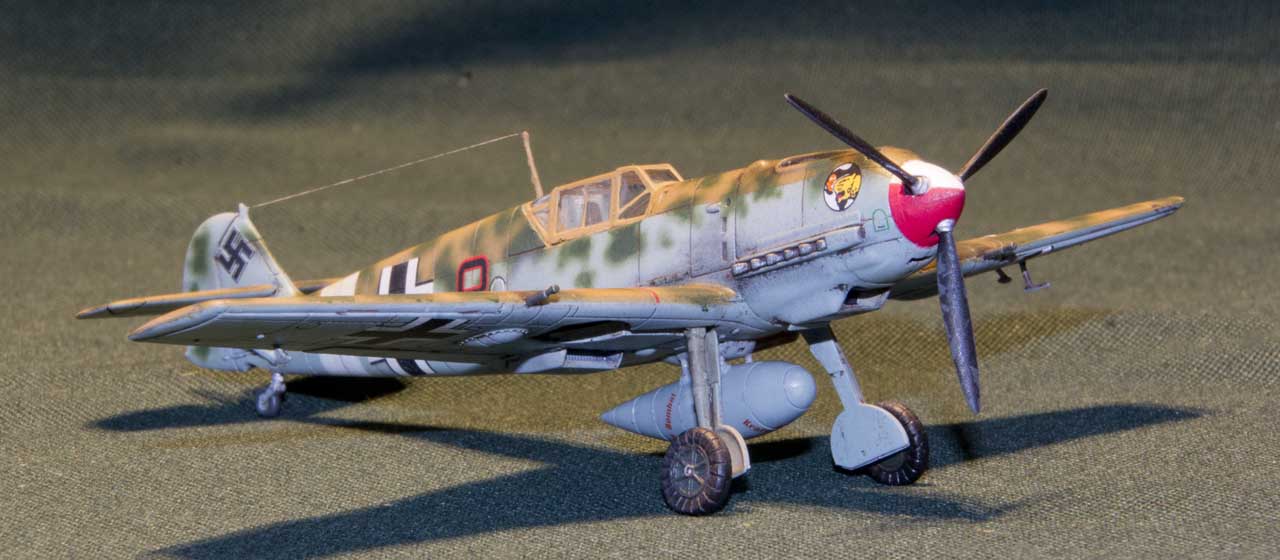
The build process with this one is so drama-free that there really isn't much point in writing anything about build process. Couple of words need however be written about the paint job. Once build, the kit was primed with PlastiKote Grey Primer. I found it in Slöjddetaljer shop (Sweden) and can recommend it for those who can find it - a very nice alternative to Vallejo Grey primer I usually use in my projects, at about half the price per can. Basic paint job was done with Lifecolor acrylics. Usual 'German' suspects were used - UA503 Hellblau for lower surfaces, UA505 Sandgelb II for upper surfaces and UA502 Dunkelgrün for mottle camo spots. Yes, I'm aware that RLM80 should have been more correct choice, mea culpa. :)
After usual post-processing with varnishes to protect the decals, I played a bit with couple of common weathering techniques, with varied success. First I applied an overall coat of dark brown Flory Models, mainly to enhance the panel lines. I'm still on the fence regarding this product, but in this case things worked out rather nicely. Once most of it was swiped away, the panel lines were very nicely lined out. Next I decided to experiment a little with oils - small dots of white, faded grey and brown were dotted irregulary all over the kit and thereafter 'worked into' the paint job with flat brush slightly damped with turpentine. Some folks can do very nice, subtle tone shifts with this technique. In this case my success was rather limited. Finally, I applied Humbrol smoke pigment around exhausts and gun barrels. With final coat of matte varnish applied, this step was mostly 'washed away' - I doubth I'll ever master pigments!
Anyway... the final result can be seen below. As already mentioned, I'm quite happy with this little kit especially since it's first time I applied freehand mottle camo with the airbrush.